Saturday 23 March 2024

Python Books for Kids


Think like a programmer with this fun beginner's guide to Python for ages 10 to 14

Kids can learn to code with the power of Python! Python Programming for Beginners is the perfect way to introduce aspiring coders to this simple and powerful coding language. This book teaches kids all about Python and programming fundamentals—and is packed full of fun and creative activities that make learning a blast!

In Python Programming for Beginners, kids will start off with the basics, learning all about fundamental coding concepts and how they can put these concepts together in Python to build their own games and programs. Each chapter focuses on a different coding concept—like variables, data types, and loops—and features three awesome coding activities to try. These activities get more difficult as they go, so young coders can see just how much their skills are growing. By the end of Python Programming for Beginners, they'll create their own fully functional sci-fi game and crack the code to a secret message!

Python Programming for Beginners features:
No coding experience needed!—Designed just for kids, this Python programming book is filled with step-by-step directions, simple explanations, and detailed code breakdowns.
Build a coding toolbox—Kids will build their programming skills, learn how to troubleshoot bugs with a handy bug-hunting guide, and practice their Python programming knowledge with cool activities.
Why Python programming?—Python is an awesome starting language for kids! It's a powerful programming language that can be used for lots of projects but features simple syntax so beginners can focus on learning programming logic.

Set kids up for a lifetime of programming success with Python Programming for Beginners .

Buy : Python Programming for Beginners: A Kid's Guide to Coding Fundamentals


Build and play your own computer games, from creative quizzes to perplexing puzzles, by coding them in the Python programming language!

Whether you're a seasoned programmer or a beginner hoping to learn Python, you'll find Coding Games in Python fun to read and easy to follow. Each chapter shows you how to construct a complete working game in simple numbered steps. Using freely available resources such as Pygame, Pygame Zero, and a downloadable pack of images and sounds, you can add animations, music, scrolling backgrounds, scenery, and other exciting professional touches.

After building the game, find out how to adapt it to create your own personalised version with secret hacks and cheat codes!

You'll master the key concepts that programmers need to write code - not just in Python, but in all programming languages. Find out what bugs, loops, flags, strings, and turtles are. Learn how to plan and design the ultimate game, and then play it to destruction as you test and debug it.

Before you know it, you'll be a coding genius!

Buy : Coding Games in Python (DK Help Your Kids)


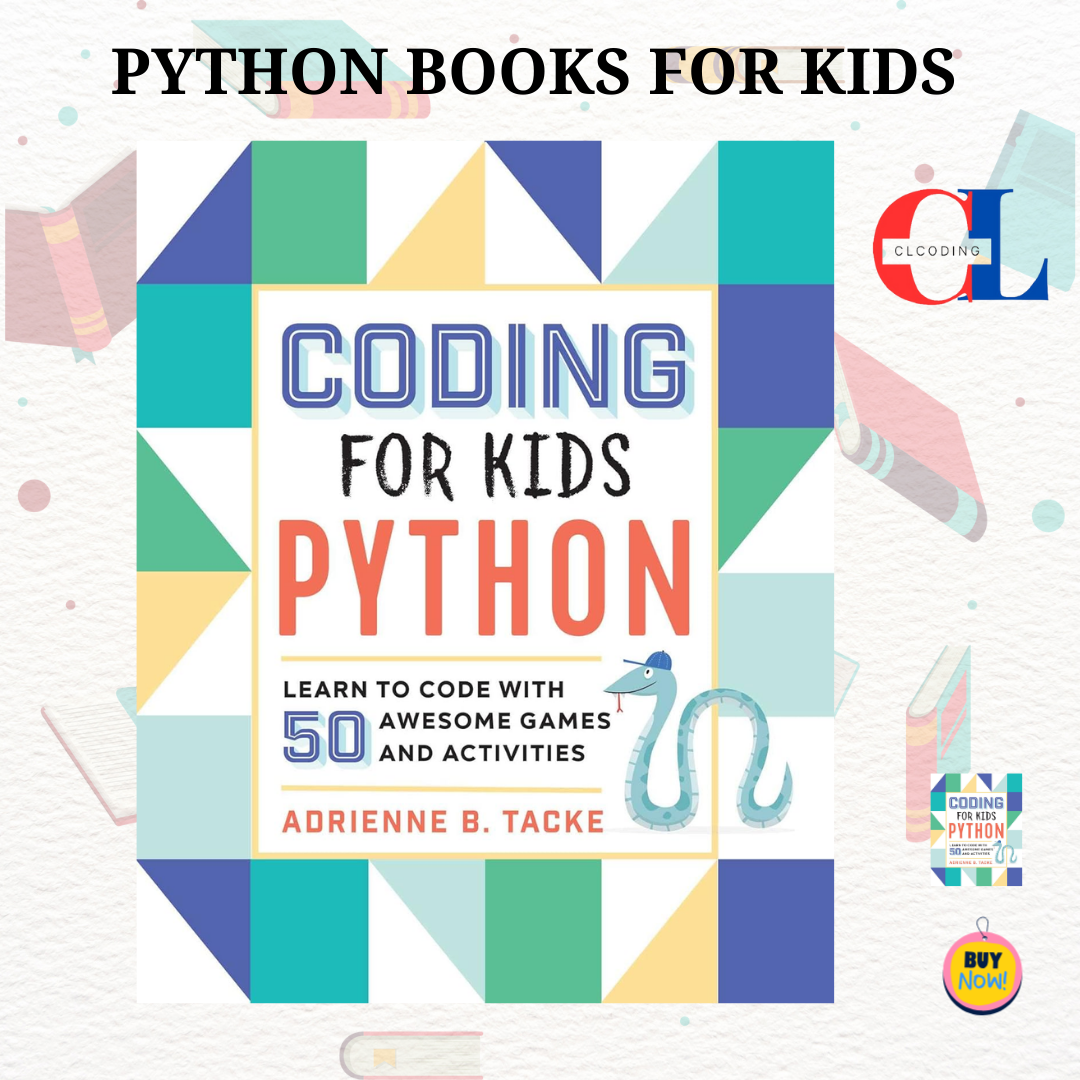
Games and activities that teach kids ages 10+ to code with Python

Learning to code isn't as hard as it sounds—you just have to get started! Coding for Kids: Python starts kids off right with 50 fun, interactive activities that teach them the basics of the Python programming language. From learning the essential building blocks of programming to creating their very own games, kids will progress through unique lessons packed with helpful examples—and a little silliness!

Kids will follow along by starting to code (and debug their code) step by step, seeing the results of their coding in real time. Activities at the end of each chapter help test their new knowledge by combining multiple concepts. For young programmers who really want to show off their creativity, there are extra tricky challenges to tackle after each chapter. All kids need to get started is a computer and this book.

This beginner's guide to Python for kids includes:
50 Innovative exercises—Coding concepts come to life with game-based exercises for creating code blocks, drawing pictures using a prewritten module, and more.
Easy-to-follow guidance—New coders will be supported by thorough instructions, sample code, and explanations of new programming terms.
Engaging visual lessons—Colorful illustrations and screenshots for reference help capture kids' interest and keep lessons clear and simple.

Encourage kids to think independently and have fun learning an amazing new skill with this coding book for kids.


Buy : Coding for Kids: Python: Learn to Code with 50 Awesome Games and Activities


The second edition of the best-selling Python for Kids—which brings you (and your parents) into the world of programming—has been completely updated to use the latest version of Python, along with tons of new projects!

Python is a powerful programming language that’s easy to learn and fun to use! But books about programming in Python can be dull and that’s no fun for anyone.

Python for Kids brings kids (and their parents) into the wonderful world of programming. Jason R. Briggs guides you through the basics, experimenting with unique (and hilarious) example programs featuring ravenous monsters, secret agents, thieving ravens, and more. New terms are defined; code is colored and explained; puzzles stretch the brain and strengthen understanding; and full-color illustrations keep you engaged throughout.

By the end of the book, you’ll have programmed two games: a clone of the famous Pong, and “Mr. Stick Man Races for the Exit”—a platform game with jumps and animation.

This second edition is revised and updated to reflect Python 3 programming practices. There are new puzzles to inspire you and two new appendices to guide you through Python’s built-in modules and troubleshooting your code.

As you strike out on your programming adventure, you’ll learn how to:

Use fundamental data structures like lists, tuples, and dictionaries
Organize and reuse your code with functions and modules
Use control structures like loops and conditional statements
Draw shapes and patterns with Python’s turtle module
Create games, animations, and other graphical wonders with tkinter

Why should serious adults have all the fun? Python for Kids is your ticket into the amazing world of computer programming.

Covers Python 3.x which runs on Windows, macOS, Linux, even Raspberry Pi

Buy : Python for Kids, 2nd Edition: A Playful Introduction to Programming


Python Coding challenge - Day 155 | What is the output of the following Python Code?


def func(x, y=5, z=10):

    return x + y + z

result = func(3, z=7)

print(result)

Solution and Explanation:

This Python code defines a function called func with three parameters: x, y, and z. The parameters y and z have default values of 5 and 10 respectively.

Here's the breakdown:

x is a positional argument.

y is a keyword argument with a default value of 5.

z is also a keyword argument with a default value of 10.

When the function func is called with func(3, z=7), it assigns 3 to x (as a positional argument), and 7 to z (as a keyword argument), while leaving y to its default value of 5.

So the function call func(3, z=7) effectively calculates 3 + 5 + 7, which equals 15.

Then, the value 15 is assigned to the variable result.

Finally, print(result) prints the value of result, which is 15. So, when you run this code, it will print 15 to the console.

Friday 22 March 2024

Creating QR Code with Logo


import qrcode

from PIL import Image


# Generate QR code for a URL

url = "https://www.clcoding.com"

qr = qrcode.QRCode(version=1, error_correction=qrcode.constants.ERROR_CORRECT_L, box_size=8, border=5)

qr.add_data(url)

qr.make(fit=True)


# Create an image with logo

image = qr.make_image(fill_color="black", back_color="pink")


# Add logo to the QR code

logo = Image.open("clcodinglogo.png")

logo_size = img.size[0] // 4

# Use Image.LANCZOS for resizing with anti-aliasing

logo = logo.resize((logo_size, logo_size), Image.LANCZOS)  

image.paste(logo, ((img.size[0] - logo.size[0]) // 2, (img.size[1] - logo.size[1]) // 2))


# Save the image

image.save("qr_code.png")

Image.open("qr_code.png")


Explantion of the code: 


This code generates a QR code for a given URL (https://www.clcoding.com) using the qrcode library and then adds a logo to the QR code using the PIL (Python Imaging Library) module. Let's break down the code step by step:

Importing libraries:

qrcode: This library is used to generate QR codes.
Image from PIL: This module provides functions to work with images.
Generating the QR code:

The URL "https://www.clcoding.com" is assigned to the variable url.
A QRCode object is created with specific parameters:
version: The version of the QR code (higher versions can store more data).
error_correction: The error correction level of the QR code.
box_size: The size of each box in the QR code.
border: The width of the border around the QR code.
The URL data is added to the QR code using the add_data() method.
The make() method is called to generate the QR code, and fit=True ensures that the size of the QR code fits the data.
Creating an image with the QR code:

The make_image() method is called to create an image representation of the QR code, with specified fill and background colors (fill_color="black", back_color="pink").
The resulting image is stored in the variable image.
Adding a logo to the QR code:

An image of the logo (clcodinglogo.png) is opened using the Image.open() method and stored in the variable logo.
The size of the logo is calculated to be a quarter of the size of the QR code.
The logo is resized using the resize() method with anti-aliasing (Image.LANCZOS filter) to prevent distortion.
The logo is pasted onto the QR code image at the center using the paste() method.
Saving and displaying the final image:

The QR code image with the logo is saved as "qr_code.png" using the save() method.
The saved image is opened and displayed using Image.open().
This code demonstrates how to generate a customized QR code with a logo using Python. Make sure to replace "clcodinglogo.png" with the filename of your logo image.

Python pattern challenge - Day 5


def print_pattern():

    for i in range(5, 0, -1):

        for j in range(i, 0, -1):

            print(chr(64 + j), end="")

        print()

print_pattern()


Solution and Explanation: 


def print_pattern()::

This line defines a function named print_pattern().
for i in range(5, 0, -1)::

This outer loop iterates over the range from 5 down to 1. The third argument -1 in range() means that it decrements by 1 in each iteration.
for j in range(i, 0, -1)::

This inner loop iterates over the range from the current value of i down to 1. So, for each iteration of the outer loop, this inner loop prints characters in decreasing order.
print(chr(64 + j), end=""):

Inside the inner loop, chr(64 + j) converts the integer ASCII value 64 + j to the corresponding character. Since we're starting from 'E' (ASCII value 69) and decrementing, 64 + j gives the ASCII value of the characters 'A' to 'E'.
end="" parameter is used to prevent print() from adding a newline character after each print, so the characters are printed horizontally.
print():

This print() statement is outside the inner loop. It's used to move to the next line after each inner loop iteration, creating a new line for the next set of characters.
print_pattern():

This line outside the function definition calls the print_pattern() function, causing the pattern to be printed according to the code within the function.

Thursday 21 March 2024

Python Coding challenge - Day 154 | What is the output of the following Python Code?


def outer():

    x = 10

    def inner():

        nonlocal x

        x += 5

        print("Inner:", x)

    inner()

    print("Outer:", x)

outer()


Solution and Explanation 

This code demonstrates nested functions in Python, along with the use of the nonlocal keyword.

Here's a breakdown of what each part does:

def outer():: This line defines a function named outer.

x = 10: Inside the outer function, a variable x is initialized with the value 10.

def inner():: Inside the outer function, another function named inner is defined.

nonlocal x: This statement inside the inner function tells Python that the variable x being referenced is not local to the inner function but belongs to the enclosing scope (which is the outer function in this case).

x += 5: Inside the inner function, x is incremented by 5.

print("Inner:", x): This line prints the value of x from the inner function after it has been incremented.

inner(): This line calls the inner function from within the outer function.

print("Outer:", x): After the inner function call, the value of x within the outer function is printed. Since x was modified within the inner function using the nonlocal keyword, its value will reflect the increment done inside the inner function.

outer(): Finally, the outer function is called, which executes the code inside it and its nested inner function.

When you run outer(), it will print:

Inner: 15

Outer: 15

This output shows that the inner function has successfully modified the value of x, and the change is reflected in the outer function as well.

Python pattern challenge - Day 4


n = 7

d = n // 2 + 1


for x in range(1, n + 1):

    for y in range(1, n + 1):

        if x == n // 2 + 1 or y == d:

            print("*", end="")

        else:

            print(" ", end="")

    if x <= n // 2:

        d += 1

    else:

        d -= 1

    print()


Let's break down the code step by step:

n = 7: This line initializes a variable n with the value 7. This value represents the size of the pattern, specifically the number of rows and columns.

d = n // 2 + 1: This line calculates the starting position for printing the asterisks in each row. Since the asterisks form a cross pattern, the distance from the left edge to the vertical center of the cross (d) is set to half of the size of the pattern plus 1. This calculation ensures that the cross is properly centered horizontally.

The nested loops:

for x in range(1, n + 1):: This outer loop iterates over each row of the pattern.

for y in range(1, n + 1):: This inner loop iterates over each column of the pattern within the current row.

Inside the nested loops, there's an if-else statement:

if x == n // 2 + 1 or y == d:: This condition checks if the current position (x, y) is on the horizontal center line (x == n // 2 + 1) or the vertical center line (y == d). If the condition is true, an asterisk is printed.

else:: If the condition is false (i.e., the current position is not on the center lines), a space is printed.

After printing each row, there's an adjustment to the variable d:

if x <= n // 2:: This condition checks if we are still in the upper half of the cross. If true, it means we need to move the vertical center (d) downwards for the next row.

else:: If we are in the lower half of the cross, we need to move the vertical center (d) upwards for the next row.

The print() statement at the end of the outer loop prints a newline character, moving to the next row in the pattern.

Overall, this code generates a cross pattern made of asterisks (*) with the specified size (n) and ensures that the cross is properly centered both horizontally and vertically.

Wednesday 20 March 2024

Python Coding challenge - Day 153 | What is the output of the following Python Code?


Code: 

def some_func(a, b, c=0, d=1):

    return a + b + c + d

result = some_func(1, 2, d=4)

print(result)

Solution and Explanation: 

This code defines a function named some_func which takes four parameters: a, b, c, and d. Parameters c and d have default values of 0 and 1 respectively. The function calculates the sum of all four parameters and returns the result.

Here's the breakdown of the function:

a, b, c, and d are parameters representing values that can be passed into the function.

c=0 and d=1 in the function signature are default parameter values. This means if you call the function without providing values for c and d, they will default to 0 and 1 respectively.

Inside the function, it calculates the sum of a, b, c, and d and returns the result.

Now, when the function is called with some_func(1, 2, d=4), the values passed are a=1, b=2, c is not specified (so it takes the default value of 0), and d=4. Therefore, the function computes 1 + 2 + 0 + 4, which equals 7.

Finally, the result, which is 7, is printed using print(result).

Tuesday 19 March 2024

Python Coding challenge - Day 152 | What is the output of the following Python Code?


def foo(x, y=[]):

    y.append(x)

    return y

print(foo(1))

print(foo(2))


This code defines a function foo that takes two arguments x and y, with y having a default value of an empty list []. Let's break down what happens:

def foo(x, y=[]):: This line defines a function named foo with two parameters, x and y. If y is not provided when calling the function, it defaults to an empty list [].

y.append(x): This line appends the value of x to the list y. Since y is a mutable object and is provided as a default argument, it retains its state across multiple calls to the function.

return y: This line returns the modified list y.

print(foo(1)): This line calls the foo function with x equal to 1. Since y is not provided explicitly, it defaults to [], which becomes [1] after appending 1 to it. So, it prints [1].

print(foo(2)): This line calls the foo function again, this time with x equal to 2. The default value of y is [1] now (the list modified in the previous call). So, 2 is appended to the existing list, resulting in [1, 2]. It prints [1, 2].

However, there's a caveat with this code due to the default mutable argument y=[]. If you call the function foo without providing a value for y, it'll reuse the same list across multiple function calls. This can lead to unexpected behavior if you're not careful. In this case, each time foo is called without specifying y, it keeps appending to the same list object. So, calling foo(1) modifies the list y to [1], and then calling foo(2) appends 2 to the modified list, resulting in [1, 2].

Python pattern challenge - Day 3


# Method 1: Using a loop

def print_sequence_loop(n):

    for i in range(n+1):

        print(f"{i}{'*' * i}")


# Method 2: Using list comprehension

def print_sequence_list_comprehension(n):

    sequence = [f"{i}{'*' * i}" for i in range(n+1)]

    print('\n'.join(sequence))


# Method 3: Using a generator function

def generate_sequence(n):

    for i in range(n+1):

        yield f"{i}{'*' * i}"


def print_sequence_generator(n):

    sequence = generate_sequence(n)

    for item in sequence:

        print(item)


# Testing the functions

n = 5


print("Using loop:")

print_sequence_loop(n)

print("\nUsing list comprehension:")

print_sequence_list_comprehension(n)

print("\nUsing generator function:")

print_sequence_generator(n)


Let's break down each part of the code:


Method 1: Using a loop

This method uses a loop to generate and print each element of the sequence.

def print_sequence_loop(n):
    for i in range(n+1):
        print(f"{i}{'*' * i}")
  • print_sequence_loop is a function that takes an integer n as input.
  • It iterates over the range from 0 to n (inclusive) using a for loop.
  • Inside the loop, it prints a string composed of the current number i followed by a number of asterisks (*) corresponding to the value of i.

Method 2: Using list comprehension

This method uses list comprehension to generate the sequence and then prints it.

def print_sequence_list_comprehension(n):
    sequence = [f"{i}{'*' * i}" for i in range(n+1)]
    print('\n'.join(sequence))
  • print_sequence_list_comprehension is a function that takes an integer n as input.
  • It uses list comprehension to generate a list where each element is a string composed of the current number i followed by a number of asterisks (*) corresponding to the value of i.
  • It then joins the elements of the list with newline characters ('\n') and prints the resulting string.

Method 3: Using a generator function

This method uses a generator function to lazily generate the sequence, and then prints it.

def generate_sequence(n):
    for i in range(n+1):
        yield f"{i}{'*' * i}"

def print_sequence_generator(n):
    sequence = generate_sequence(n)
    for item in sequence:
        print(item)
  • generate_sequence is a generator function that yields each element of the sequence lazily. It takes an integer n as input.
  • Inside the function, it iterates over the range from 0 to n (inclusive) using a for loop, yielding a string composed of the current number i followed by a number of asterisks (*) corresponding to the value of i.
  • print_sequence_generator is a function that takes an integer n as input.
  • It creates a generator object sequence by calling generate_sequence(n).
  • It then iterates over the elements of the generator using a for loop, printing each element.

The statistics module in Python


Calculating Mean:

import statistics


data = [1, 2, 3, 4, 5]

mean = statistics.mean(data)

print("Mean:", mean)


#clcoding.com

Mean: 3

Calculating Median:

import statistics


data = [1, 2, 3, 4, 5]

median = statistics.median(data)

print("Median:", median)


#clcoding.com

Median: 3

Calculating Mode:

import statistics


data = [1, 2, 2, 3, 4, 4, 4, 5]

mode = statistics.mode(data)

print("Mode:", mode)


#clcoding.com

Mode: 4

Calculating Variance:

import statistics


data = [1, 2, 3, 4, 5]

variance = statistics.variance(data)

print("Variance:", variance)


#clcoding.com

Variance: 2.5

Calculating Standard Deviation:

import statistics


data = [1, 2, 3, 4, 5]

std_dev = statistics.stdev(data)

print("Standard Deviation:", std_dev)


#clcoding.com

Standard Deviation: 1.5811388300841898

Calculating Quartiles:

import statistics


data = [1, 2, 3, 4, 5]

q1 = statistics.quantiles(data, n=4)[0]

q3 = statistics.quantiles(data, n=4)[-1]

print("First Quartile (Q1):", q1)

print("Third Quartile (Q3):", q3)


#clcoding.com

First Quartile (Q1): 1.5

Third Quartile (Q3): 4.5

Calculating Correlation Coefficient:

import statistics


data1 = [1, 2, 3, 4, 5]

data2 = [2, 4, 6, 8, 10]

corr_coeff = statistics.correlation(data1, data2)

print("Correlation Coefficient:", corr_coeff)


#clcoding.com

Correlation Coefficient: 1.0


Monday 18 March 2024

Python pattern challenge - Day 2


Method 1: Using Nested Loops

def print_pattern(rows):
    for i in range(rows):
        num = 1
        for j in range(1, i + 2):
            print(num, end='')
            num = num * (i + 1 - j) // j
        print()

print_pattern(5) 
 # Change the argument to adjust the number of rows

let's break down the code step by step:

def print_pattern(rows):: This line defines a function named print_pattern that takes one argument rows, which represents the number of rows in the pattern.

for i in range(rows):: This loop iterates over each row of the pattern. It goes from 0 to rows - 1.

num = 1: Initializes the variable num to 1 for each row. This variable will hold the numbers to be printed on each row.

for j in range(1, i + 2):: This loop iterates over each column in the current row. It goes from 1 to i + 1.

print(num, end=''): Prints the value of num without a newline character. This ensures that all numbers in the same row are printed on the same line.

num = num * (i + 1 - j) // j: This line updates the value of num for the next column. It calculates the next number in the row based on the previous number using the formula (i + 1 - j) / j. This formula generates Pascal's triangle pattern.

print(): Prints a newline character after printing all numbers in the current row, moving to the next row.

print_pattern(5): Calls the print_pattern function with an argument of 5, which means it will print a pattern with 5 rows. You can change this argument to adjust the number of rows in the pattern.

The pattern generated by this code resembles Pascal's triangle, where each number in a row is the sum of the two numbers directly above it in the previous row.

Method 2: Using Recursion

def print_pattern_recursive(rows):
    if rows == 0:
        return
    print_pattern_recursive(rows - 1)
    row = [1]
    for i in range(1, rows):
        row.append(row[-1] * (rows - i) // i)
    print("".join(map(str, row)))

print_pattern_recursive(5)  
# Change the argument to adjust the number of rows

 let's break down the code step by step:

def print_pattern_recursive(rows):: This line defines a function named print_pattern_recursive that takes one argument rows, which represents the number of rows in the pattern.

if rows == 0:: This is the base case for the recursion. If rows is equal to 0, the function returns immediately, as there's no pattern to print.

return: This statement exits the function immediately if the base case is met.

print_pattern_recursive(rows - 1): This is the recursive call. It calls the print_pattern_recursive function with rows - 1, effectively reducing the number of rows to be printed in each recursive call.

row = [1]: Initializes a list row with a single element, 1. This represents the first row of the pattern.

for i in range(1, rows):: This loop iterates over each row index starting from 1 up to rows - 1.

row.append(row[-1] * (rows - i) // i): This line calculates and appends the next number to the row list. It uses the formula to generate Pascal's triangle pattern: (previous_number * (rows - i)) / i. This formula generates each number in the current row based on the numbers in the previous row.

print("".join(map(str, row))): This line prints the current row as a string by joining all elements in the row list and separating them with an empty string. This effectively prints the numbers of the current row without spaces between them.

print_pattern_recursive(5): Calls the print_pattern_recursive function with an argument of 5, which means it will print a pattern with 5 rows. You can change this argument to adjust the number of rows in the pattern.

The pattern generated by this code is similar to Pascal's triangle, where each number in a row is the sum of the two numbers directly above it in the previous row. However, this code generates each row recursively.

Method 3: Using List Comprehension


def print_pattern_list_comprehension(rows):
    pattern = [[1]]
    [pattern.append([1] + [pattern[-1][j] + pattern[-1][j + 1] for j in range(len(pattern[-1]) - 1)] + [1]) for _ in range(1, rows)]
    [print("".join(map(str, p))) for p in pattern]

print_pattern_list_comprehension(5)  
# Change the argument to adjust the number of rows

Let's break down the code step by step:

def print_pattern_list_comprehension(rows):: This line defines a function named print_pattern_list_comprehension that takes one argument rows, representing the number of rows in the pattern.

pattern = [[1]]: Initializes a list pattern with a nested list containing a single element, which is [1]. This represents the first row of the pattern.

[pattern.append([1] + [pattern[-1][j] + pattern[-1][j + 1] for j in range(len(pattern[-1]) - 1)] + [1]) for _ in range(1, rows)]: This is a list comprehension that generates the pattern rows. It iterates over a range starting from 1 up to rows - 1.

pattern[-1] accesses the last row in the pattern list.

[pattern[-1][j] + pattern[-1][j + 1] for j in range(len(pattern[-1]) - 1)] generates the elements of the new row based on the previous row. It iterates over indices j of the previous row and calculates each element by summing adjacent elements.

[1] is appended at the beginning and end of the row to maintain the pattern structure.

pattern.append(...) adds the newly generated row to the pattern list.

[print("".join(map(str, p))) for p in pattern]: This is another list comprehension that prints each row of the pattern. It iterates over each row p in the pattern list, converts each element to a string, joins them without any separator using "".join(), and then prints the resulting string.

print_pattern_list_comprehension(5): Calls the print_pattern_list_comprehension function with an argument of 5, which means it will print a pattern with 5 rows. You can change this argument to adjust the number of rows in the pattern.

The pattern generated by this code is similar to Pascal's triangle, where each number in a row is the sum of the two numbers directly above it in the previous row. However, this code utilizes list comprehensions to generate and print the pattern efficiently.

The faker library in Python


The faker library in Python


Installing faker:

pip install faker

Generating Fake Names:

from faker import Faker

# Create a Faker object
faker = Faker()

# Generate a fake name
fake_name = faker.name()
print("Fake Name:", fake_name)

#clcoding.com
Fake Name: Anthony Ortiz

Generating Fake Addresses:

from faker import Faker

# Create a Faker object
faker = Faker()

# Generate a fake address
fake_address = faker.address()
print("Fake Address:", fake_address)

#clcoding.com 
Fake Address: 098 Parker Burg Suite 277
Olsonborough, IN 35433

Generating Fake Email Addresses:

from faker import Faker

# Create a Faker object
faker = Faker()

# Generate a fake email address
fake_email = faker.email()
print("Fake Email Address:", fake_email)

#clcoding.com 
Fake Email Address: choward@example.com

Generating Fake Text:

from faker import Faker

# Create a Faker object
faker = Faker()

# Generate fake text
fake_text = faker.text()
print("Fake Text:\n", fake_text)

#clcoding.com
Fake Text:
 Election huge event. Remember go else purpose specific detail position eight. High project outside quickly try research.
Degree affect detail together. Way company along relate set.

Generating Fake Dates:

from faker import Faker

# Create a Faker object
faker = Faker()

# Generate a fake date
fake_date = faker.date_of_birth()
print("Fake Date of Birth:", fake_date)

#clcoding.com
Fake Date of Birth: 1950-10-06

Generating Fake User Profiles:

from faker import Faker

# Create a Faker object
faker = Faker()

# Generate a fake user profile
fake_profile = faker.profile()
print("Fake User Profile:", fake_profile)

#clcoding.com
Fake User Profile: {'job': 'Insurance claims handler', 'company': 'Mitchell-Martinez', 'ssn': '590-06-5154', 'residence': '90056 Medina Brooks\nMeyermouth, AK 19255', 'current_location': (Decimal('25.254868'), Decimal('19.597316')), 'blood_group': 'B+', 'website': ['https://johnson-bentley.com/', 'https://stevenson.com/'], 'username': 'qparker', 'name': 'Jay Sims', 'sex': 'M', 'address': '6742 Moore Fields\nMartinton, ME 47664', 'mail': 'fmiranda@hotmail.com', 'birthdate': datetime.date(1985, 8, 7)}

Sunday 17 March 2024

Python Coding challenge - Day 151 | What is the output of the following Python Code?


Let's break down the code:

s = 'clcoding'

index = s.find('n', -1)  

print(index)

s = 'clcoding': This line initializes a variable s with the string 'clcoding'.

index = s.find('n', -1): This line uses the find() method on the string s. The find() method searches for the specified substring within the given string. It takes two parameters: the substring to search for and an optional parameter for the starting index. If the starting index is negative, it counts from the end of the string.

In this case, 'n' is the substring being searched for.

The starting index -1 indicates that the search should start from the end of the string.

Since the substring 'n' is not found in the string 'clcoding', the method returns -1.

print(index): This line prints the value stored in the variable index, which is the result of the find() method. In this case, it will print -1, indicating that the substring 'n' was not found in the string 'clcoding'.

So, the overall output of this code will be -1.

Saturday 16 March 2024

Python Coding challenge - Day 150 | What is the output of the following Python Code?


Let's break down each line:

my_tuple = (1, 2, 3): This line creates a tuple named my_tuple containing three elements: 1, 2, and 3.

x, y, z, *rest = my_tuple: This line uses tuple unpacking to assign values from my_tuple to variables x, y, z, and rest. The *rest syntax is used to gather any extra elements into a list called rest.


x is assigned the first element of my_tuple, which is 1.

y is assigned the second element of my_tuple, which is 2.

z is assigned the third element of my_tuple, which is 3.

*rest gathers any remaining elements of my_tuple (if any) into a list named rest. In this case, there are no remaining elements, so rest will be an empty list.

print(x, y, z, rest): This line prints the values of x, y, z, and rest.


x, y, and z are the values assigned earlier, which are 1, 2, and 3 respectively.

rest is an empty list since there are no remaining elements in my_tuple.

Therefore, when you run this code, it will output:

1 2 3 []

Operators - Lecture 2


Q:- What is Operator ?

 Operators are symbol or special characters that perform specific

operations on one or more operands (Values or Variables).

Assignment Question

1. Write a program that prompts the user to enter their name, age, and

favorite number. Calculate and print the product of their age and

favorite number.

2. Write a program that prompts the user for enter a sentence and then

check the length of the sentence and prints the sentence also.

3. Write a program that takes two sentences from user and then checks for

the length of both sentences using “Identity Operators”.

4. Write a program that takes a integer value from the user and checks that

the number is between 10 and 20 then it will print true or else false , use

Logical and & or operator both for checking the result.

5. Write the uses of all the operators which comes inside these operators

use comments in python for writing the uses :-

 Arithmetic operators

 Assignment operators

 Comparison operators

 Logical operators

 Identity operators


Basics of Coding - Lecture 1


1. What is coding?

->Coding refers to the process of creating instructions for a computer to

perform specific tasks. It involves writing lines of code using a programming

language that follows a defined syntax and set of rules.

Coding can be used to create software applications, websites, algorithms, and

much more. It is a fundamental skill in the field of computer science and in

essential for anyone interested in software development, data analysis,

machine learning, and various other technological domains.

2. What is algorithm?

->An algorithm is a set of clear and specific instructions that guide the

computer to solve a problem or complete a task efficiently and accurately. It’s

like a recipe that tells the computer exactly what do to achieve a desired

outcome.

3. Who created Python?

-> Python was created by Guido van Rossum. He started developing Python in

the late 1980s, and the first version of the programming language was released

in 1991.

4. What is Python?

->Python is a popular and easy to learn programming language. It is known for

it’s simplicity and readability, making it a great choice for beginners. Python is

versatile and can be used for a wide range of tasks, from web development to

data analysis and artificial intelligence. It’s clear syntax and extensive library

support make it efficient and productive for software development. Overall,

Python is a powerful yet user-friendly language that is widely used in the tech

industry.

Assignment Questions

1. Declare two variables, x and y, and assign them the values 5

and 3, respectively. Calculate their sum and print the result.

2. Declare a variable radius and assign it a value of 7. Calculate the

area of a circle with that radius and print the result.


3. Declare a variable temperature and assign it a value of 25.

Convert the temperature from Celsius to Fahrenheit and print the

result.

4. Declare three variables a, b, and c and assign them the values

10, 3.5, and 2, respectively. Calculate the result of a divided by the

product of b and c and print the result.

5. Declare a variable initial_amount and assign it a value of 1000.

Calculate the compound interest after one year with an interest rate

of 5% and print the result.

6. Declare a variable seconds and assign it a value of 86400.

Convert the seconds into hours, minutes, and seconds, and print the

result in the format: "hh:mm:ss".

7. Declare a variable numerator and assign it a value of 27.

Declare another variable denominator and assign it a value of 4.

Calculate the integer division and remainder of numerator divided by

denominator and print both results.

8. Declare a variable length and assign it a value of 10. Calculate

the perimeter and area of a square with that length and print the

results.

Friday 15 March 2024

The json library in Python


The json library in Python

1. Encoding Python Data to JSON:

import json

# Python dictionary to be encoded to JSON

data = {

    "name": "John",

    "age": 30,

    "city": "New York"

}

# Encode the Python dictionary to JSON

json_data = json.dumps(data)

print("Encoded JSON:", json_data)


#clcoding.com

Encoded JSON: {"name": "John", "age": 30, "city": "New York"}

2. Decoding JSON to Python Data:

import json

# JSON data to be decoded to Python

json_data = '{"name": "John", "age": 30, "city": "New York"}'

# Decode the JSON data to a Python dictionary

data = json.loads(json_data)

print("Decoded Python Data:", data)

#clcoding.com

Decoded Python Data: {'name': 'John', 'age': 30, 'city': 'New York'}

3. Reading JSON from a File:

clcoding

import json

# Read JSON data from a file

with open('clcoding.json', 'r') as file:

    data = json.load(file)

print("JSON Data from File:", data)

#clcoding.com

JSON Data from File: {'We are supporting freely to everyone. Join us for live support. \n\nWhatApp Support: wa.me/919767292502\n\nInstagram Support : https://www.instagram.com/pythonclcoding/\n\nFree program: https://www.clcoding.com/\n\nFree Codes: https://clcoding.quora.com/\n\nFree Support: pythonclcoding@gmail.com\n\nLive Support: https://t.me/pythonclcoding\n\nLike us: https://www.facebook.com/pythonclcoding\n\nJoin us: https://www.facebook.com/groups/pythonclcoding': None}

4. Writing JSON to a File:

import json

# Python dictionary to be written to a JSON file

data = {

    "name": "John",

    "age": 30,

    "city": "New York"

}

# Write the Python dictionary to a JSON file

with open('output.json', 'w') as file:

    json.dump(data, file)

    #clcoding.com

5. Handling JSON Errors:

import json

# JSON data with syntax error

json_data = '{"name": "John", "age": 30, "city": "New York"'

try:

    # Attempt to decode JSON data

    data = json.loads(json_data)

except json.JSONDecodeError as e:

    # Handle JSON decoding error

    print("Error decoding JSON:", e)

    #clcoding.com

Error decoding JSON: Expecting ',' delimiter: line 1 column 47 (char 46)

Thursday 14 March 2024

Python Coding challenge - Day 149 | What is the output of the following Python Code?


Let's break down the given code:

for i in range(1, 3):

    print(i, end=' - ')

This code snippet is a for loop in Python. Let's go through it step by step:

for i in range(1, 3)::

This line initiates a loop where i will take on values from 1 to 2 (inclusive). The range() function generates a sequence of numbers starting from the first argument (1 in this case) up to, but not including, the second argument (3 in this case).

So, the loop will iterate with i taking on the values 1 and 2.

print(i, end=' - '):

Within the loop, this line prints the current value of i, followed by a dash (-), without moving to the next line due to the end=' - ' parameter.

So, during each iteration of the loop, it will print the value of i followed by a dash and space.

When you execute this code, it will output:

1 - 2 - 

Explanation: The loop runs for each value of i in the range (1, 3), which are 1 and 2. For each value of i, it prints the value followed by a dash and space. So, the output is 1 - 2 - .


Learn hashlib library in Python


1. Hashing Strings:

import hashlib

# Hash a string using SHA256 algorithm

string_to_hash = "Hello, World!"

hashed_string = hashlib.sha256(string_to_hash.encode()).hexdigest()

print("Original String:", string_to_hash)

print("Hashed String:", hashed_string)

#clcoding.com 

Original String: Hello, World!

Hashed String: dffd6021bb2bd5b0af676290809ec3a53191dd81c7f70a4b28688a362182986f

2. Hashing Files:

#clcoding.com 

import hashlib

def calculate_file_hash(file_path, algorithm='sha256'):

    # Choose the hash algorithm

    hash_algorithm = getattr(hashlib, algorithm)()

    # Read the file in binary mode and update the hash object

    with open(file_path, 'rb') as file:

        for chunk in iter(lambda: file.read(4096), b''):

            hash_algorithm.update(chunk)

    # Get the hexadecimal representation of the hash value

    hash_value = hash_algorithm.hexdigest()

    return hash_value

# Example usage

file_path = 'example.txt'

file_hash = calculate_file_hash(file_path)

print("SHA-256 Hash of the file:", file_hash)

#clcoding.com 

SHA-256 Hash of the file: e3b0c44298fc1c149afbf4c8996fb92427ae41e4649b934ca495991b7852b855

3. Using Different Hash Algorithms:

import hashlib

# Hash a string using different algorithms

string_to_hash = "Hello, World!"

# MD5

md5_hash = hashlib.md5(string_to_hash.encode()).hexdigest()

# SHA1

sha1_hash = hashlib.sha1(string_to_hash.encode()).hexdigest()

# SHA512

sha512_hash = hashlib.sha512(string_to_hash.encode()).hexdigest()

print("MD5 Hash:", md5_hash)

print("SHA1 Hash:", sha1_hash)

print("SHA512 Hash:", sha512_hash)

#clcoding.com 

MD5 Hash: 65a8e27d8879283831b664bd8b7f0ad4

SHA1 Hash: 0a0a9f2a6772942557ab5355d76af442f8f65e01

SHA512 Hash: 374d794a95cdcfd8b35993185fef9ba368f160d8daf432d08ba9f1ed1e5abe6cc69291e0fa2fe0006a52570ef18c19def4e617c33ce52ef0a6e5fbe318cb0387

4. Hashing Passwords (Securely):

import hashlib

# Hash a password securely using a salt

password = "my_password"

salt = "random_salt"


hashed_password = hashlib.pbkdf2_hmac('sha256', password.encode(), salt.encode(), 100000)

hashed_password_hex = hashed_password.hex()

print("Salted and Hashed Password:", hashed_password_hex)


#clcoding.com 

Salted and Hashed Password: b18597b62cda4415c995eaff30f61460da8ff4d758d3880f80593ed5866dcf98

5. Verifying Passwords:

import hashlib

# Verify a password against a stored hash

stored_hash = "stored_hashed_password"

def verify_password(password, stored_hash):

    input_hash = hashlib.sha256(password.encode()).hexdigest()

    if input_hash == stored_hash:

        return True

    else:

        return False

password_to_verify = "password_to_verify"

if verify_password(password_to_verify, stored_hash):

    print("Password is correct!")

else:

    print("Password is incorrect.")


#clcoding.com 

Password is incorrect.

6. Hashing a String using SHA-256:

import hashlib

# Create a hash object

hash_object = hashlib.sha256()

# Update the hash object with the input data

input_data = b'Hello, World!'

hash_object.update(input_data)

# Get the hexadecimal representation of the hash value

hash_value = hash_object.hexdigest()

print("SHA-256 Hash:", hash_value)

#clcoding.com 

SHA-256 Hash: dffd6021bb2bd5b0af676290809ec3a53191dd81c7f70a4b28688a362182986f

7. Hashing a String using MD5:

import hashlib

# Create a hash object

hash_object = hashlib.md5()

# Update the hash object with the input data

input_data = b'Hello, World!'

hash_object.update(input_data)

# Get the hexadecimal representation of the hash value

hash_value = hash_object.hexdigest()

print("MD5 Hash:", hash_value)

#clcoding.com 

MD5 Hash: 65a8e27d8879283831b664bd8b7f0ad4


Wednesday 13 March 2024

Learn psutil library in Python 🧵:


Learn psutil library in Python

pip install psutil

1. Getting CPU Information:

import psutil

# Get CPU information

cpu_count = psutil.cpu_count()

cpu_percent = psutil.cpu_percent(interval=1)


print("CPU Count:", cpu_count)

print("CPU Percent:", cpu_percent)


#clcoding.com 

CPU Count: 8

CPU Percent: 6.9

2. Getting Memory Information:

import psutil

# Get memory information

memory = psutil.virtual_memory()

total_memory = memory.total

available_memory = memory.available

used_memory = memory.used

percent_memory = memory.percent

print("Total Memory:", total_memory)

print("Available Memory:", available_memory)

print("Used Memory:", used_memory)

print("Memory Percent:", percent_memory)

#clcoding.com

Total Memory: 8446738432

Available Memory: 721600512

Used Memory: 7725137920

Memory Percent: 91.5

3. Listing Running Processes:

import psutil

# List running processes

for process in psutil.process_iter():

    print(process.pid, process.name())

    #clcoding.com

0 System Idle Process

4 System

124 Registry

252 chrome.exe

408 PowerToys.Peek.UI.exe

436 msedge.exe

452 svchost.exe

504 smss.exe

520 svchost.exe

532 RuntimeBroker.exe

544 TextInputHost.exe

548 svchost.exe

680 csrss.exe

704 fontdrvhost.exe

768 wininit.exe

776 chrome.exe

804 chrome.exe

848 services.exe

924 lsass.exe

1036 WUDFHost.exe

1100 svchost.exe

1148 svchost.exe

1160 SgrmBroker.exe

1260 dllhost.exe

1284 PowerToys.exe

1328 svchost.exe

1392 svchost.exe

1400 svchost.exe

1408 svchost.exe

1488 svchost.exe

1504 svchost.exe

1512 svchost.exe

1600 SmartAudio3.exe

1608 svchost.exe

1668 svchost.exe

1716 svchost.exe

1724 IntelCpHDCPSvc.exe

1732 svchost.exe

1752 svchost.exe

1796 TiWorker.exe

1828 svchost.exe

1920 chrome.exe

1972 svchost.exe

1992 svchost.exe

2016 svchost.exe

2052 svchost.exe

2060 svchost.exe

2068 IntelCpHeciSvc.exe

2148 igfxCUIService.exe

2168 svchost.exe

2224 svchost.exe

2260 svchost.exe

2316 svchost.exe

2360 chrome.exe

2364 svchost.exe

2400 MsMpEng.exe

2420 svchost.exe

2428 svchost.exe

2448 PowerToys.FancyZones.exe

2480 screenrec.exe

2488 svchost.exe

2496 svchost.exe

2504 svchost.exe

2552 svchost.exe

2604 svchost.exe

2616 MemCompression

2716 svchost.exe

2792 chrome.exe

2796 dasHost.exe

2804 chrome.exe

2852 svchost.exe

2876 svchost.exe

2932 CxAudioSvc.exe

3016 svchost.exe

3240 svchost.exe

3416 svchost.exe

3480 svchost.exe

3536 spoolsv.exe

3620 svchost.exe

3660 svchost.exe

3700 svchost.exe

3752 RuntimeBroker.exe

3848 taskhostw.exe

3976 svchost.exe

3984 svchost.exe

3992 svchost.exe

4000 svchost.exe

4008 svchost.exe

4016 svchost.exe

4024 svchost.exe

4032 svchost.exe

4100 svchost.exe

4132 OneApp.IGCC.WinService.exe

4140 AnyDesk.exe

4148 armsvc.exe

4156 CxUtilSvc.exe

4208 WMIRegistrationService.exe

4284 msedge.exe

4312 svchost.exe

4320 AGMService.exe

4340 svchost.exe

4488 chrome.exe

4516 svchost.exe

4584 svchost.exe

4720 jhi_service.exe

4928 chrome.exe

5004 chrome.exe

5176 dwm.exe

5348 svchost.exe

5368 Flow.exe

5380 svchost.exe

5536 chrome.exe

5540 chrome.exe

5584 audiodg.exe

5620 svchost.exe

5724 svchost.exe

5776 svchost.exe

5992 ctfmon.exe

6032 CompPkgSrv.exe

6056 SearchProtocolHost.exe

6076 msedge.exe

6120 SearchIndexer.exe

6128 RuntimeBroker.exe

6156 svchost.exe

6192 MoUsoCoreWorker.exe

6380 PowerToys.PowerLauncher.exe

6424 PowerToys.Awake.exe

6480 msedge.exe

6596 svchost.exe

6740 svchost.exe

6792 winlogon.exe

6856 TrustedInstaller.exe

6872 svchost.exe

6888 igfxEM.exe

6908 svchost.exe

6948 chrome.exe

7140 csrss.exe

7296 PowerToys.KeyboardManagerEngine.exe

7336 WhatsApp.exe

7348 chrome.exe

7416 chrome.exe

7440 MusNotifyIcon.exe

7444 StartMenuExperienceHost.exe

7480 svchost.exe

7520 chrome.exe

7556 SearchApp.exe

7560 SecurityHealthService.exe

7720 msedge.exe

8220 MmReminderService.exe

8316 RuntimeBroker.exe

8636 svchost.exe

8836 python.exe

9088 ShellExperienceHost.exe

9284 svchost.exe

9344 NisSrv.exe

9560 msedge.exe

9664 chrome.exe

9736 chrome.exe

9784 SearchApp.exe

9808 svchost.exe

9868 python.exe

9884 svchost.exe

9908 chrome.exe

9936 chrome.exe

9996 QtWebEngineProcess.exe

10012 taskhostw.exe

10024 chrome.exe

10148 svchost.exe

10228 svchost.exe

10236 PowerToys.CropAndLock.exe

10304 Taskmgr.exe

10324 Video.UI.exe

10584 svchost.exe

10680 chrome.exe

10920 LockApp.exe

11064 chrome.exe

11176 chrome.exe

11188 msedge.exe

11396 msedge.exe

11500 QtWebEngineProcess.exe

11592 svchost.exe

12132 msedge.exe

12212 RuntimeBroker.exe

12360 RuntimeBroker.exe

12500 chrome.exe

12596 python.exe

12704 chrome.exe

12744 svchost.exe

12832 svchost.exe

12848 MicTray64.exe

12852 fontdrvhost.exe

12992 chrome.exe

13092 chrome.exe

13268 chrome.exe

13332 chrome.exe

13388 sihost.exe

13572 chrome.exe

13760 SecurityHealthSystray.exe

13792 msedge.exe

13880 fodhelper.exe

13900 chrome.exe

14160 UserOOBEBroker.exe

14220 RuntimeBroker.exe

14260 chrome.exe

14356 msedge.exe

14572 chrome.exe

14648 chrome.exe

14696 PowerToys.AlwaysOnTop.exe

14852 chrome.exe

14868 PowerToys.ColorPickerUI.exe

14876 conhost.exe

14888 PowerToys.PowerOCR.exe

14948 chrome.exe

15324 explorer.exe

4. Getting Process Information:

252

import psutil

# Get information for a specific process

pid = 252  # Replace with the process ID of interest

process = psutil.Process(pid)

print("Process Name:", process.name())

print("Process Status:", process.status())

print("Process CPU Percent:", process.cpu_percent(interval=1))

print("Process Memory Info:", process.memory_info())

#clcoding.com

Process Name: chrome.exe

Process Status: running

Process CPU Percent: 0.0

Process Memory Info: pmem(rss=29597696, vms=24637440, num_page_faults=14245, peak_wset=37335040, wset=29597696, peak_paged_pool=635560, paged_pool=635560, peak_nonpaged_pool=21344, nonpaged_pool=17536, pagefile=24637440, peak_pagefile=33103872, private=24637440)

5. Killing a Process:

import psutil

# Kill a process

pid_to_kill = 10088  

# Replace with the process ID to kill

process_to_kill = psutil.Process(pid_to_kill)

process_to_kill.terminate()

#clcoding.com

6. Getting Disk Usage:

import psutil

# Get disk usage information

disk_usage = psutil.disk_usage('/')

total_disk_space = disk_usage.total

used_disk_space = disk_usage.used

free_disk_space = disk_usage.free

disk_usage_percent = disk_usage.percent

print("Total Disk Space:", total_disk_space)

print("Used Disk Space:", used_disk_space)

print("Free Disk Space:", free_disk_space)

print("Disk Usage Percent:", disk_usage_percent)

#clcoding.com

Total Disk Space: 479491600384

Used Disk Space: 414899838976

Free Disk Space: 64591761408

Disk Usage Percent: 86.5

Tuesday 12 March 2024

Python Coding challenge - Day 148 | What is the output of the following Python Code?


Let's break down the provided code:

d = {'Milk': 1, 'Soap': 2, 'Towel': 3}

if 'Soap' in d:

    print(d['Soap'])

d = {'Milk': 1, 'Soap': 2, 'Towel': 3}: This line initializes a dictionary named d with three key-value pairs. Each key represents an item, and its corresponding value represents the quantity of that item. In this case, there are items such as 'Milk', 'Soap', and 'Towel', each associated with a quantity.

if 'Soap' in d:: This line checks whether the key 'Soap' exists in the dictionary d. It does this by using the in keyword to check if the string 'Soap' is a key in the dictionary. If 'Soap' is present in the dictionary d, the condition evaluates to True, and the code inside the if block will execute.

print(d['Soap']): If the key 'Soap' exists in the dictionary d, this line will execute. It retrieves the value associated with the key 'Soap' from the dictionary d and prints it. In this case, the value associated with 'Soap' is 2, so it will print 2.

So, in summary, this code checks if the dictionary contains an entry for 'Soap'. If it does, it prints the quantity of soap available (which is 2 in this case).

Plots using Python


1. Line Plot:

#clcoding.com

import matplotlib.pyplot as plt

# Sample data

x = [1, 2, 3, 4, 5]

y = [2, 4, 6, 8, 10]

# Create a line plot

plt.plot(x, y)

plt.xlabel('X-axis')

plt.ylabel('Y-axis')

plt.title('Line Plot Example')

plt.show()

#clcoding.com


2. Bar Plot:

import matplotlib.pyplot as plt

# Sample data

categories = ['A', 'B', 'C', 'D']

values = [10, 20, 15, 25]

# Create a bar plot

plt.bar(categories, values)

plt.xlabel('Categories')

plt.ylabel('Values')

plt.title('Bar Plot Example')

plt.show()


3. Histogram:

import matplotlib.pyplot as plt

import numpy as np

# Generate random data

data = np.random.randn(1000)

# Create a histogram

plt.hist(data, bins=30)

plt.xlabel('Values')

plt.ylabel('Frequency')

plt.title('Histogram Example')

plt.show()


4. Scatter Plot:

import matplotlib.pyplot as plt

import numpy as np

# Generate random data

x = np.random.randn(100)

y = 2 * x + np.random.randn(100)

# Create a scatter plot

plt.scatter(x, y)

plt.xlabel('X-axis')

plt.ylabel('Y-axis')

plt.title('Scatter Plot Example')

plt.show()


5. Box Plot:

import seaborn as sns

import numpy as np

# Generate random data

data = np.random.randn(100)

# Create a box plot

sns.boxplot(data=data)

plt.title('Box Plot Example')

plt.show()


6. Violin Plot:

import seaborn as sns

import numpy as np

# Generate random data

data = np.random.randn(100)

# Create a violin plot

sns.violinplot(data=data)

plt.title('Violin Plot Example')

plt.show()


7. Heatmap:

#clcoding.com

import seaborn as sns

import numpy as np

# Generate random data

data = np.random.rand(10, 10)

#clcoding.com

# Create a heatmap

sns.heatmap(data)

plt.title('Heatmap Example')

plt.show()


8. Area Plot:

import matplotlib.pyplot as plt

# Sample data #clcoding.com

x = [1, 2, 3, 4, 5]

y1 = [2, 4, 6, 8, 10]

y2 = [1, 3, 5, 7, 9]

# Create an area plot

plt.fill_between(x, y1, color="skyblue", alpha=0.4)

plt.fill_between(x, y2, color="salmon", alpha=0.4)

plt.xlabel('X-axis')

plt.ylabel('Y-axis')

plt.title('Area Plot Example')

plt.show()


9. Pie Chart:

import matplotlib.pyplot as plt

# Sample data

sizes = [30, 20, 25, 15, 10]

labels = ['A', 'B', 'C', 'D', 'E']

# Create a pie chart

plt.pie(sizes, labels=labels, autopct='%1.1f%%', startangle=140)

plt.title('Pie Chart Example')

plt.show()


10. Polar Plot:

g

import matplotlib.pyplot as plt

import numpy as np

# Sample data

theta = np.linspace(0, 2*np.pi, 100)

r = np.sin(3*theta)

# Create a polar plot #clcoding.com

plt.polar(theta, r)

plt.title('Polar Plot Example')

plt.show()


11. 3D Plot:

import matplotlib.pyplot as plt

import numpy as np

# Sample data

x = np.linspace(-5, 5, 100)

y = np.linspace(-5, 5, 100)

X, Y = np.meshgrid(x, y)

Z = np.sin(np.sqrt(X**2 + Y**2))

# Create a 3D surface plot

fig = plt.figure()

ax = fig.add_subplot(111, projection='3d')

ax.plot_surface(X, Y, Z)

ax.set_title('3D Plot Example')

plt.show()


12. Violin Swarm Plot:

#clcoding.com

import seaborn as sns

import numpy as np

# Generate random data

data = np.random.randn(100)

#clcoding.com

# Create a violin swarm plot

sns.violinplot(data=data, inner=None, color='lightgray')

sns.swarmplot(data=data, color='blue', alpha=0.5)

plt.title('Violin Swarm Plot Example')

plt.show()


13. Pair Plot:

import seaborn as sns

import pandas as pd

# Load sample dataset

iris = sns.load_dataset('iris')

# Create a pair plot

sns.pairplot(iris)

plt.title('Pair Plot Example')

plt.show()


Monday 11 March 2024

Python Coding challenge - Day 147 | What is the output of the following Python Code?


In Python, the is operator checks whether two variables reference the same object in memory, while the == operator checks for equality of values. Now, let's analyze the given code:

g = (1, 2, 3)

h = (1, 2, 3)

print(f"g is h: {g is h}")

print(f"g == h: {g == h}")

Explanation:

Identity (is):

The g is h expression checks if g and h refer to the same object in memory.

In this case, since tuples are immutable, Python creates separate objects for g and h with the same values (1, 2, 3).

Equality (==):


The g == h expression checks if the values contained in g and h are the same.

Tuples are compared element-wise. In this case, both tuples have the same elements (1, 2, 3).

Output:

The output of the code will be:

g is h: False

g == h: True

Explanation of Output:

g is h: False: The is operator returns False because g and h are distinct objects in memory.

g == h: True: The == operator returns True because the values inside g and h are the same.

In summary, the tuples g and h are different objects in memory, but they contain the same values, leading to == evaluating to True.

Cybersecurity using Python


1. Hashing Passwords:

import hashlib

def hash_password(password):

    hashed_password = hashlib.sha256(password.encode()).hexdigest()

    return hashed_password

# Example

password = "my_secure_password"

hashed_password = hash_password(password)

print("Hashed Password:", hashed_password)

#clcoding.com 

Hashed Password: 2c9a8d02fc17ae77e926d38fe83c3529d6638d1d636379503f0c6400e063445f

2. Generating Random Passwords:

import random

import string

def generate_random_password(length=12):

    characters = string.ascii_letters + string.digits + string.punctuation

    password = ''.join(random.choice(characters) for _ in range(length))

    return password

# Example

random_password = generate_random_password()

print("Random Password:", random_password)

#clcoding.com 

Random Password: zH7~ANoO:7#S

3. Network Scanning with Scapy:

from scapy.all import IP, ICMP, sr1

def ping(host):

    packet = IP(dst=host)/ICMP()

    response = sr1(packet, timeout=2, verbose=0)

    if response:

        return f"{host} is online"

    else:

        return f"{host} is offline"

# Example

host_to_scan = "example.com"

result = ping(host_to_scan)

print(result)

#clcoding.com

4. Web Scraping for Security Research:

import requests

from bs4 import BeautifulSoup

def scrape_security_news():

    url = "https://example-security-news.com"

    response = requests.get(url)

    soup = BeautifulSoup(response.text, 'html.parser')

    headlines = soup.find_all('h2', class_='security-headline')

    return [headline.text for headline in headlines]

# Example

security_headlines = scrape_security_news()

print("Security Headlines:", security_headlines)

#clcoding.com

5. Password Cracking Simulation:

import hashlib

def simulate_password_cracking(hashed_password, password_list):

    for password in password_list:

        if hashlib.sha256(password.encode()).hexdigest() == hashed_password:

            return f"Password cracked: {password}"

    return "Password not found"

# Example

hashed_password_to_crack = "d033e22ae348aeb5660fc2140aec35850c4da997"

common_passwords = ["password", "123456", "qwerty", "admin"]

result = simulate_password_cracking(hashed_password_to_crack, common_passwords)

print(result)

#clcoding.com

6. Secure File Handling:

import os

def secure_file_deletion(file_path):

    with open(file_path, 'w') as file:

        file.write(os.urandom(1024))  

        # Overwrite the file with random data

    os.remove(file_path)

    print(f"{file_path} securely deleted")

# Example

file_path_to_delete = "example.txt"

secure_file_deletion(file_path_to_delete)

#clcoding.com


Sunday 10 March 2024

Python Coding challenge - Day 146 | What is the output of the following Python Code?


Let's go through the code step by step:

years = 5: Initializes a variable named years with the value 5.

if True or False:: This is an if statement with a condition. The condition is True or False, which will always be True because the logical OR (or) operator returns True if at least one of the operands is True. In this case, True is always True, so the condition is satisfied.

years = years + 2: Inside the if block, there's an assignment statement that adds 2 to the current value of the years variable. Since the condition is always True, this line of code will always be executed.

print(years): Finally, this line prints the current value of the years variable.

As a result, the code will always enter the if block, increment the value of years by 2 (from 5 to 7), and then print the final value of years, which is 7.

Saturday 9 March 2024

try and except in Python


Example 1: Handling a Specific Exception

try:

    # Code that might raise an exception

    num = int(input("Enter a number: "))

    result = 10 / num

    print("Result:", result)

except ZeroDivisionError:

    # Handle the specific exception (division by zero)

    print("Error: Cannot divide by zero.")

except ValueError:

    # Handle the specific exception (invalid input for conversion to int)

    print("Error: Please enter a valid number.")


#clcoding.com

Enter a number: 5

Result: 2.0

Example 2: Handling Multiple Exceptions

try:

    file_name = input("Enter the name of a file: ")


    # Open and read the contents of the file

    with open(file_name, 'r') as file:

        contents = file.read()

        print("File contents:", contents)

except FileNotFoundError:

    # Handle the specific exception (file not found)

    print("Error: File not found.")

except PermissionError:

    # Handle the specific exception (permission error)

    print("Error: Permission denied to access the file.")


except Exception as e:

    # Handle any other exceptions not explicitly caught

    print(f"An unexpected error occurred: {e}")

    #clcoding.com

Enter the name of a file: clcoding

Error: File not found.

Example 3: Using a Generic Exception

try:

    # Code that might raise an exception

    x = int(input("Enter a number: "))

    y = 10 / x

    print("Result:", y)

except Exception as e:

    # Catch any type of exception

    print(f"An error occurred: {e}")


 #clcoding.com

Enter a number: 5

Result: 2.0

Python Coding challenge - Day 145 | What is the output of the following Python Code?


Let's evaluate the provided Python code:

a = 20 or 40

if 30 <= a <= 50:

    print('Hello')

else:

    print('Hi')

Here's a step-by-step breakdown:

Assignment of a:

a = 20 or 40: In Python, the or operator returns the first true operand or the last operand if none are true. In this case, 20 is considered true, so a is assigned the value 20.

Condition Check:

if 30 <= a <= 50:: Checks whether the value of a falls within the range from 30 to 50 (inclusive).

Print Statement Execution:

Since a is assigned the value 20, which is outside the range 30 to 50, the condition is not met.

Therefore, the else block is executed, and the output will be Hi.

Let's run through the logic:

Is 30 <= 20 <= 50? No.

So, the else block is executed, and 'Hi' is printed.

The output of this code will be:

Hi

Popular Posts

Categories

AI (27) Android (24) AngularJS (1) Assembly Language (2) aws (17) Azure (7) BI (10) book (4) Books (118) C (77) C# (12) C++ (82) Course (62) Coursera (180) Cybersecurity (22) data management (11) Data Science (95) Data Strucures (6) Deep Learning (9) Django (6) Downloads (3) edx (2) Engineering (14) Excel (13) Factorial (1) Finance (6) flutter (1) FPL (17) Google (19) Hadoop (3) HTML&CSS (46) IBM (25) IoT (1) IS (25) Java (92) Leet Code (4) Machine Learning (44) Meta (18) MICHIGAN (5) microsoft (4) Pandas (3) PHP (20) Projects (29) Python (753) Python Coding Challenge (230) Questions (2) R (70) React (6) Scripting (1) security (3) Selenium Webdriver (2) Software (17) SQL (40) UX Research (1) web application (8)

Followers

Person climbing a staircase. Learn Data Science from Scratch: online program with 21 courses