Showing posts with label HTML&CSS. Show all posts

Wednesday 7 February 2024

The Full Stack


What you'll learn

Build a Django app

 Use the full stack

Configure an environment

Join Free: The Full Stack

There are 5 modules in this course

As you prepare for your role in back-end development, practice bringing together multiple skills to build a full-stack Django app. You’ll start by setting up an environment for a local practical project, and refactoring the front and back-ends of an existing application. You will then have the opportunity to create the front and back-ends of a new application using your full-stack developer skills.

By the end of this course you will be able to:

- Explain common concepts related to full stack development
- Use HTML, CSS and JavaScript to develop well-structured, interactive and responsive websites
- Build a full stack application using Django that stores its data in models on a MySQL database and updates its pages with forms and API endpoints
- Describe the different environments that web applications are deployed to

To complete this course you will need previous experience with back-end development, Python, version control, databases, Django web framework and APIs.

HTML and CSS in depth


What you'll learn

Create a simple form with a responsive layout using HTML5 and CSS

Create a responsive layout using CSS 

Create a UI using Bootstrap

Implement debugging tools

Join Free: HTML and CSS in depth

There are 3 modules in this course

In this course, you’ll use software development tools like HTML to build attractive web pages that work well—and you’ll use structured semantic data to control how websites appear to the end user. 

You will then dive deeper into CSS by applying increasingly specific styling to various elements. You’ll learn to use Bootstrap’s grid system to create layouts and work with components and themes. Finally, you’ll explore debugging and learn how it can be utilized to banish common front-end errors.

By the end of this course you will be able to:

Create a simple form with a responsive layout using HTML5 and CSS
Create a responsive layout using CSS 
Create a UI using Bootstrap
Implement debugging tools

This is a beginner course for learners who would like to prepare themselves for a career in front-end development. To succeed in this course, you do not need prior development experience, only basic internet navigation skills and an eagerness to get started with coding.

Tuesday 6 February 2024

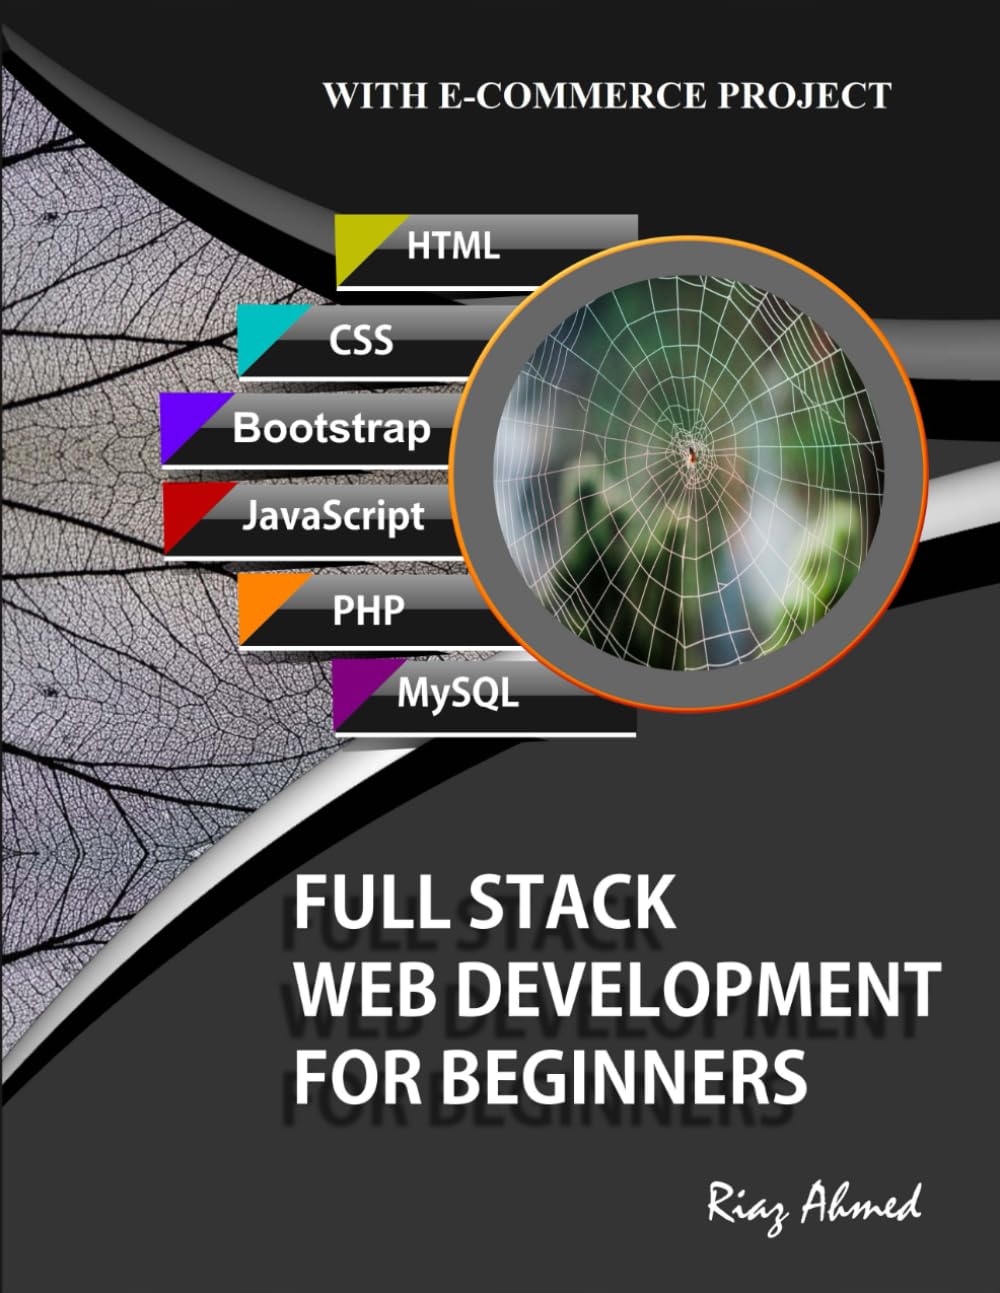
Full Stack Web Development For Beginners: Learn Ecommerce Web Development Using HTML5, CSS3, Bootstrap, JavaScript, MySQL, and PHP


Note: This work is revised today (04 November 2022) to provide new instructions on installing AMPPS (version 4.3) and accessing the phpMyAdmin interface which now requires a username and password.

This book is written for absolute beginners who want to become full-stack web application developers. To become a professional full-stack web developer you have to put on many hats. HTML5, CSS3, Bootstrap, JavaScript, MySQL, and PHP are the core technologies that you must be acquainted with to develop moderate data-driven web applications. All these technologies are voluminous and you need ample time to learn each one of them.

In this fast-changing technological world, no one has time to go through bulky books on these core technologies. With so many web technologies out there in the market, novices are confused and do not have enough time to evaluate these technologies to decide what to pick for their career and where to start. Keeping aside the least utilized features, I've written this book to focus on the more operational areas of these technologies that act as the first stepping stone and will provide you with a solid jump-start into the exciting world of web development. This book is meant to help you learn web development quickly by yourself. It follows a tutorial approach in which hands-on exercises, augmented with illustrations, are provided to teach you web application development in a short period of time. Once you get grips on these core web development technologies through this book, you will be able to easily set the destination for your future.

With uncountable sites and freely available material, this book is written due to the following reasons:

Assemble all scattered pieces in one place. This volume contains HTML5, CSS3, JavaScript, Bootstrap, PHP and MySQL. Sequential instructions are provided to download and install the required software and components to set up a complete development environment on your own pc.

Focus on inspiring practical aspects of these web technologies.

Last but not least, move novices gradually right from creating an HTML file with a text editor, through learning HTML, CSS, JavaScript, Bootstrap, MySQL, and PHP all the way to creating and deploying a professional e-commerce website that comprises static and dynamic pages.

From web introduction to hands-on examples and from website designing to its deployment, this book surely is a complete resource for those who know little or nothing about professional web development.

Hard Copy: Full Stack Web Development For Beginners: Learn Ecommerce Web Development Using HTML5, CSS3, Bootstrap, JavaScript, MySQL, and PHP

Wednesday 20 December 2023

Introduction to Web Development


There are 6 modules in this course

This course is designed to start you on a path toward future studies in web development and design, no matter how little experience or technical knowledge you currently have. The web is a very big place, and if you are the typical internet user, you probably visit several websites every day, whether for business, entertainment or education. But have you ever wondered how these websites actually work? How are they built? How do browsers, computers, and mobile devices interact with the web? What skills are necessary to build a website? With almost 1 billion websites now on the internet, the answers to these questions could be your first step toward a better understanding of the internet and developing a new set of internet skills.  

Join Free:Introduction to Web Development

By the end of this course you’ll be able to describe the structure and functionality of the world wide web, create dynamic web pages using a combination of HTML, CSS, and JavaScript, apply essential programming language concepts when creating HTML forms, select an appropriate web hosting service, and publish your webpages for the world to see. Finally, you’ll be able to develop a working model for creating your own personal or business websites in the future and be fully prepared to take the next step in a more advanced web development or design course or specialization.

Introduction to Web Development with HTML, CSS, JavaScript


What you'll learn

Describe the Web Application Development Ecosystem and terminology like front-end developer, back-end, server-side, and full stack.

Identify the developer tools and integrated development environments (IDEs) used by web developers. 

Create and structure basic web pages using HTML and style them with CSS. 

Develop dynamic web pages with interactive features using JavaScript.

Join Free:Introduction to Web Development with HTML, CSS, JavaScript

There are 5 modules in this course

Want to take the first steps to become a Web Developer? This course will help you discover the languages, frameworks, and tools that you will need to create interactive and engaging websites right from the beginning.  

You will begin by learning about the roles of front-end, back-end, and full-stack developers and how they work together on development projects. Through this, you will also become familiar with the terminology and skills needed in your career as a web developer.  

Next, you will explore the languages needed for developing websites or applications. You will gain a thorough understanding of HTML and CSS and learn how a combination of both technologies can help developers create the structure and style of their websites.  

Finally, you will learn how JavaScript can make your webpages dynamic with features that include interactive forms, dynamic content modification, and sophisticated menu systems. 

By learning the fundamentals of HTML5, CSS, and JavaScript you will be able to combine them to:  

- create the basic structure of a website  
- create format and layout for web applications 
- enhance your website and create rich, interactive applications 
- increase user interactivity and enhance user experience 
- give your website a real wow factor! 

In this course you will practice what you learn with numerous hands-on labs. Lastly, you will complete a final project where you will create a webpage to showcase your skills and have a great addition to your portfolio!

Monday 30 October 2023

Build a Website using an API with HTML, JavaScript, and JSON (Free Course)


Objectives

Provide ability for website users to look up 7 day weather forecasts for major European cities
Keep website visitors on the website longer
Increase online bookings

About this Project

In this project, you’ll support a European travel agency’s effort to increase booking by building a webpage that provides visitors with a 7-day weather forecast for major European cities. 


Accomplishing this task will require you to retrieve real-time weather data from an external service. In creating the webpage, you’ll request, process, and present the weather data using HTML, JavaScript, and JSON. 


There isn’t just one right approach or solution in this scenario, which means you can create a truly unique project that helps you stand out to employers.


ROLE: Software Developer


SKILLS: Web Design, Web Development, Cloud API


PREREQUISITES: 

Function closures, asynchronous processing, REST API, and JSON handling with JavaScript

Present content with HTML tags 

Present content using classes with CSS

Format and syntax of JSON

JOIN Free - Build a Website using an API with HTML, JavaScript, and JSON

Wednesday 22 March 2023

Creating a LOG IN form by taking image in background

In this we are going to make a Log_In form in which login filling options will be in a transparent box. And you can add your own background image also. 

Note*:- TO change the background go inside the style tag. Inside style tag go to the body and in background-image change the address of the url , give the address of the image which you want to keep in your background. Now,your image will be display on background.

 CODE:- LOG_IN_FORM

LOG IN


Foget Password?
 

  <!DOCTYPE html>
<html lang="en">
<head>
    <meta charset="UTF-8">
    <meta http-equiv="X-UA-Compatible" content="IE=edge">
    <meta name="viewport" content="width=device-width, initial-scale=1.0">
    <title>LOG_IN_FORM</title>
    <style>
body{
    background-image: url('/images/flower.jpg');
    background-position-x: center;
    background-size: cover;
}
.container{
    text-align: center;
    padding: 28px ;
    margin-left: 30%;
    margin-right: 30%;
    background-color: rgb(238, 192, 234);
    border-radius: 20px;
    display: block;
    box-shadow: 0 15px 20px rgba(0,0,0,.2);
    opacity: 0.8;
}
.txt{
    background-color: rgba(223, 210, 227, 0.9);
    border-radius: 25px;
    opacity: 0.9;
    margin-left: 30%;
    margin-right: 30%;
    text-align: center;
    font-family:cursive;
    font-size:xx-large;
    
}
input[type=text] , input[type=password]
{
    width: 350px;   
    margin: 8px 0;
    padding: 12px 20px;   
    display: inline-block ;   
    border: 2px solid skyblue;
    border-radius: 9px;
    box-sizing: border-box ;
    
}
button{
    background-color: #c120ac;   
         width: 30%;  
         border-radius: 20px;
          color: black;   
          padding: 15px;   
          margin: 10px 0px;   
          border: none;   
          cursor: pointer;
}
button:hover{
    opacity: 0.7;
}
    </style>
</head>
<body>
    <h2 class="txt">
 LOG IN
    </h2>
    <form action="login.php">
        <div class="container">
            <label>Username</label> <br>
            <input type="text" name="username" placeholder="Enter Your Username" required> <br>
            <label >Password</label> <br>
            <input type="password" name="password" placeholder="Enter Your Password" required> <br>
            <button  type="submit">LOG IN</button>
            <button  type="reset">SIGN UP</button> <br>
            <a href="#">Foget Password?</a>

        </div>
    </form>
</body>
</html>

 OUTPUT:-The image in background is what I have selected in background you can choose your own it will be displayed like this only and you can change the colour of the box also inside the style tag in .txt and .container.

Friday 17 March 2023

Fancy Hover Buttons in HTML using CSS

 In this we are going to add three types of hover button styles which will make your buttons very innovative and attractive.

1.Border Pop

2.Background Slide

3.Background Circle

 Code:-

<!DOCTYPE html>
<html lang="en">
<head>
    <meta charset="UTF-8">
    <meta http-equiv="X-UA-Compatible" content="IE=edge">
    <meta name="viewport" content="width=device-width, initial-scale=1.0">
    <title>Fancy Buttons</title>
    <style>
        * ,*::before ,*::after{
            box-sizing: border-box;
        }
        body{
            display: flex;
            justify-content: center;
            align-items: center;
            flex-wrap: wrap;
            margin: 0;
        }
        button{
            margin: 1rem;
        }
        .btn{
            background-color: var(--background-color);
            color: #222;
            padding: .5em 1em;
            border: none;
            outline: none;
            position: relative;
            cursor: pointer;

            --background-color: #E3E3E3;
            --border-size:2px;
            --accent-color: #0af;
        }
        .btn.btn-border-pop::before{
            content: "";
            position: absolute;
            top: 0;
            left: 0;
            right: 0;
            bottom:0;
            z-index: -1;
            border: var(--border-size) solid var(--background-color);
            transition: top,left,right,bottom,100ms ease-in-out;
        }
        .btn.btn-border-pop:hover::before,
        .btn.btn-border-pop:focus::before{
            top: calc(var(--border-size)* -2);
            left: calc(var(--border-size)* -2);
            right: calc(var(--border-size)* -2);
            bottom: calc(var(--border-size)* -2);
        }
        .btn.btn-background-slide::before{
            content: "";
            position: absolute;
            top: 0;
            left: 0;
            right: 0;
            bottom: 0;
            background-color: var(--accent-color);
            z-index: -1;
            transition: transform 300ms ease-in-out;
            transform: scale(0);
            transform-origin: left;   
        }
        .btn.btn-background-slide:hover::before,
        .btn.btn-background-slide:focus::before{
        transform: scale(1);

        }

        .btn.btn-background-slide{
            z-index: 1;
            transition: color 300ms ease-in-out;
        }
        .btn.btn-background-slide:hover,
        .btn.btn-background-slide:focus{
            color: white;
        }
        .btn.btn-background-circle::before{
         content: "";
         position: absolute;
         top: 0;
         left:0;
         right:0;
         bottom: 0;
         z-index: -1;
         background-color: var(--background-color);
         border-radius: 50%;
         transition: transform 500ms ease-in-out;

         transform: scale(1.5);
        }
        .btn.btn-background-circle:hover::before,
        .btn.btn-background-circle:focus::before{
         transform:scale(0);
        }


        .btn.btn-background-circle{
            z-index:1;
            overflow: hidden;
            background-color: black;
            transition: color 500ms ease-in-out;
        }
        .btn.btn-background-circle:hover,
        .btn.btn-background-circle:focus{
              color: white;
        }

        .btn.btn-border-underline::before {
            content: "";
            color: brown;
            position: absolute;
            left: 0;
            right: 0;
            bottom: 0;
            height: var(--border-size);
            background-color: var(--accent-color);
            transform: scaleX(0);
        }

    </style>
</head>
<body>
    <button class="btn btn-border-pop">Border Pop</button>
    <button class="btn btn-background-slide">Background Slide</button>
    <button class="btn btn-background-circle">Background Circle</button>
   
</body>
</html> 

Output:-

Tuesday 12 March 2019

Learning PHP, MySQL & JavaScript, 5th Edition With jQuery, CSS & HTML5 (Learning PHP, MYSQL, Javascript, CSS & HTML5)

Build interactive, data-driven websites with the potent combination of open-source technologies and web standards, even if you have only basic HTML knowledge. With this popular hands-on guide, you'll tackle dynamic web programming with the help of today's core technologies: PHP, MySQL, JavaScript, jQuery, CSS and HTML5.

Explore each technology separately, learn how to use them together and pick up valuable web programming practices along the way. At the end of the book, you'll put everything together to build a fully functional social networking site, using XAMPP or any development stack you choose.

  • Learn PHP in-depth, along with the basics of object-oriented programming
  • Explore MySQL, from database structure to complex queries
  • Use the MySQLi Extension, PHP's improved MySQL interface
  • Create dynamic PHP web pages that tailor themselves to the user
  • Manage cookies and sessions and maintain a high level of security
  • Master the JavaScript language-and enhance it with jQuery
  • Use Ajax calls for background browser/server communication
  • Acquire CSS2 and CSS3 skills for professionally styling your web pages
  • Implement all of the new HTML5 features, including geolocation, audio, video and the canvas
Buy :

Learning PHP, MySQL & JavaScript with j Query, CSS & HTML5 Paperback – 2015 by Robin Nixon  

PDF Download :

Learning PHP, MySQL & JavaScript with j Query, CSS & HTML5 Paperback – 2015 by Robin Nixon 


Sunday 15 April 2018

Student Registration Form

Program:-

<html>
<head>
<script type=”text/javascript” src=”validate.js”></script>
</head>
<body>
<form action=”#” name=”StudentRegistration” onsubmit=”return(validate());”>
<table cellpadding=”2″ width=”20%” bgcolor=”99FFFF” align=”center”
cellspacing=”2″>
<tr>
<td colspan=2>
<center><font size=4><b>Student Registration Form</b></font></center>
</td>
</tr>
<tr>
<td>Name</td>
<td><input type=text name=textnames id=”textname” size=”30″></td>
</tr>
<tr>
<td>Father Name</td>
<td><input type=”text” name=”fathername” id=”fathername”
size=”30″></td>
</tr>
<tr>
<td>Postal Address</td>
<td><input type=”text” name=”paddress” id=”paddress” size=”30″></td>
</tr>
<tr>
<td>Personal Address</td>
<td><input type=”text” name=”personaladdress”
id=”personaladdress” size=”30″></td>
</tr>
<tr>
<td>Sex</td>
<td><input type=”radio” name=”sex” value=”male” size=”10″>Male
<input type=”radio” name=”sex” value=”Female” size=”10″>Female</td>
</tr>
<tr>
<td>City</td>
<td><select name=”City”>
<option value=”-1″ selected>select..</option>
<option value=”New Delhi”>NEW DELHI</option>
<option value=”Mumbai”>MUMBAI</option>
<option value=”Goa”>GOA</option>
<option value=”Patna”>PATNA</option>
</select></td>
</tr>
<tr>
<td>Course</td>
<td><select name=”Course”>
<option value=”-1″ selected>select..</option>
<option value=”B.Tech”>B.TECH</option>
<option value=”MCA”>MCA</option>
<option value=”MBA”>MBA</option>
<option value=”BCA”>BCA</option>
</select></td>
</tr>
<tr>
<td>District</td>
<td><select name=”District”>
<option value=”-1″ selected>select..</option>
<option value=”Nalanda”>NALANDA</option>
<option value=”UP”>UP</option>
<option value=”Goa”>GOA</option>
<option value=”Patna”>PATNA</option>
</select></td>
</tr>
<tr>
<td>State</td>
<td><select Name=”State”>
<option value=”-1″ selected>select..</option>
<option value=”New Delhi”>NEW DELHI</option>
<option value=”Mumbai”>MUMBAI</option>
<option value=”Goa”>GOA</option>
<option value=”Bihar”>BIHAR</option>
</select></td>
</tr>
<tr>
<td>PinCode</td>
<td><input type=”text” name=”pincode” id=”pincode” size=”30″></td>
</tr>
<tr>
<td>EmailId</td>
<td><input type=”text” name=”emailid” id=”emailid” size=”30″></td>
</tr>
<tr>
<td>DOB</td>
<td><input type=”text” name=”dob” id=”dob” size=”30″></td>
</tr>
<tr>
<td>MobileNo</td>
<td><input type=”text” name=”mobileno” id=”mobileno” size=”30″></td>
</tr>
<tr>
<td><input type=”reset”></td>
<td colspan=”2″><input type=”submit” value=”Submit Form” /></td>
</tr>
</table>
</form>
</body>
</html>

Entry Level Form


Program:-
<html>
<head>
<title>Entry Level Form</title>
</head>
<body>
<form>
<ul class=”form-style-1″>
<li><label>Full Name <span class=”required”>*</span></label><input type=”text” name=”field1″ class=”field-divided” placeholder=”First” />&nbsp;
<input type=”text” name=”field2″ class=”field-divided” placeholder=”Last” /></li>
<br>
<li>
<label>Email <span class=”required”>*</span></label>
<input type=”email” name=”field3″ class=”field-long” />
</br>
</li>
<br>
<li>
<label>Subject</label>
<select name=”field4″ class=”field-select”>
<option value=”Select”>select</option>
<option value=”MatLab”>MatLab</option>
<option value=”Java”>Java</option>
<option value=”HTML”>HTML</option>
<option value=”CSS”>CSS</option>
<option value=”C and C++”>C and C++</option>
<option value=”General Question”>General</option>
</select>
</br>
</li>
<br>
<li>
<label>Your Message <span class=”required”>*</span></label>
<textarea name=”field5″ id=”field5″ class=”field-long field-textarea”></textarea>
</br>
</li>
<br>
<li>
<input type=”submit” value=”Submit” />
</br>
</li>
</ul>
</form>
</body>
</html>

Personal Details Form


Program:-

<html>
<head>
<title>Personal Details Form</title>
</head>
<body>
<div class=”form-style-3″>
<form>
<fieldset><legend>Personal Details</legend>
<label for=”field1″><span> Full Name <span class=”required”>*</span></span>
<input type=”text” class=”input-field” name=”field1″ value=”” /></label>
<label for=”field2″><span>Email <span class=”required”>*</span></span>
<input type=”email” class=”input-field” name=”field2″ value=”” /></label>
<label for=”field3″><span>Phone <span class=”required”>*</span></span>
<input type=”text” class=”input-field” name=”field3″ value=”” /></label>
<label for=”field4″><span>Subject</span><select name=”field4″ class=”select-field”>
<option value=”Select”>Select</option>
<option value=”MatLab”>MatLab</option>
<option value=”JAVA”>Java</option>
<option value=”HTML and CSS”>HTML and CSS</option>
<option value=”C and C++”>C and C++</option>
<option value=”Any Question”>Any Question</option>
</select></label>
</fieldset>
<fieldset><legend>Message</legend>
<label for=”field6″><span>Message <span class=”required”>*</span></span><textarea name=”field6″ class=”textarea-field”></textarea></label>
<label><span>&nbsp;</span><input type=”submit” value=”Submit” /></label>
</fieldset>
</form>
</div>
</body>
</html>

Information Form


Program:-

<html>
<head>
<title>Information Form</title>
</head>
<body>
<form class=“form-style-9”>
<ul>
<li>
<input type=“text” name=“field1” class=“field-style field-split align-left” placeholder=“Name” />
<input type=“email” name=“field2” class=“field-style field-split align-right” placeholder=“Email” />
</li>
<li>
<input type=“text” name=“field3” class=“field-style field-split align-left” placeholder=“Phone” />
<input type=“url” name=“field4” class=“field-style field-split align-right” placeholder=“Website” />
</li>
<li>
<input type=“text” name=“field3” class=“field-style field-full align-none” placeholder=“Subject” />
</li>
<li>
<textarea name=“field5” class=“field-style” placeholder=“Message”></textarea>
</li>
<li>
<input type=“submit” value=“Send Message” />
</li>
</ul>
</form>
</body>
</html>

Website Design in HTML and CSS


<html>
<head>
<title>Castor Classes</title>
<style type=”text/css”>
body{
background-color:gray;
font-family:Arial,Helvetica,sans-serif;
}
*
{
margin:0;
padding:0;
}
#wrapper{
border:1px solid;
width:970px;
padding:2px;
background-color:gray;
}
#header{
border:1px solid;
width:100%;
background-color:white;
}
#header ul{
list-style-type:none;
}
#header ul li{
border:1px solid;
float:left;
color:sky;
background-color:green;
width:190px;
text-align:center;;
height:30px;
line-height:30px;
}
#header ul li a{
text-decoration:none;
}
#header ul li:hover{
background-color:blue;
}
#image{
width:100px;
}
#bodypart{
border:1px solid;
margin-top:10px;
}
#bodyleft{
border:1px solid;
float:left;
width:250px;
}
#bodyleft h2{
background-color:pink;
color:sky;
padding:4px;
}
#bodyleft ul{
list-style-type:none;
}
#bodyleft ul li{
border:1px solid;
padding:5px;
height:30px;
line-height:20px;
}
#bodyleft ul li a{
color:black;
text-decoration:none;
}
#bodyleft ul li:hover{
color:blue;
background-color:yellow;
}
#bodyright{
border:1px solid;
width:1070px;
float:left;
margin-left:2px;
padding-right:10px;
}
#bodyright h2{
background-color:black;
color:red;
padding:2px;
}
#bodyright p{
padding:6px;
padding-right:10px;
font:20px;
text-align:justify;
}
#footer{
border:1px solid;
background-color:pink;
color:blue;
text-decoration:none;
padding:1px;
margin-top:1px;
}
#footerright{
border:0px solid;
width:150px;
margin-left:10px;
float:right;
margin-bottom:3px;
padding:1px;
text-decoration:none;
}

</style>
</head>
<body>
<div id=”wrapper”>
<div id=”header”>
<ul>
<li><a href=”#”> Home</a></li>
<li><a href=”#”>About Us</a></li>
<li><a href=”#”>Courses</a></li>
<li><a href=”#”>Contact</a></li>
<li><a href=”#”>Online Video</a></li>
</ul>
<div id=”image”></div>
<img src=”html/image/online.jpg”/></div>
</div>
<div id=”bodypart”>
<div id=”bodyleft”>
<h2>Courses</h2>
<ul>
<li><a href=”http://castorclasses.com/courses/matlab-program-2/”>MatLab </a></li>
<li><a href=”http://castorclasses.com/courses/c-language/”>C Language</a></li>
<li><a href=”http://castorclasses.com/php-programs/”>PhP </a></li>
<li><a href=”http://castorclasses.com/courses/java/”>Java </a></li>
<li><a href=”http://castorclasses.com/html-and-css/”>HTML and CSS </a></li>
<li><a href=”#”> C++</a></li>
</ul>
</div>
<div id=”bodyright”>
<h2>Welcome to our online Courses (Castor Classes)</h2>
<p>This is provide a online classes for all subject.Online courses are revolutionizing formal education,
and have opened a new genre of outreach on cultural and scientific topics. These courses deliver a series of lessons to a web browser or mobile device,
to be conveniently accessed anytime, anyplace.</p>
<p>An online course is designed as a built environment for learning.Deciding to study online can bring up a whole range of emotions –
excitement, pride and maybe a little apprehension –
but don’t worry. With Open Colleges,
you’ll have all the flexibility and support you need to get through your course and create a new future.
Find out more about the benefits of studying online with us below,
discover more about how online learning works, or simply go ahead and get started.</p>
<p>This is provide a online classes for all subject.Online courses are revolutionizing formal education, but don’t worry. With Open Colleges,
you’ll have all the flexibility and support you need to get through your course and create a new future.
Find out more about the benefits of studying online with us below,
and have opened a new genre of outreach on cultural and scientific topics. These courses deliver a series of lessons to a web browser or mobile device,
to be conveniently accessed anytime, anyplace.</p>
</div>
<br clear=”all”/>
</div>
<div id=”footer”>
<h3>About Us</h3>
<li><a href=”http://castorclasses.com/contact-us/about-us/introduction/”>Introduction</li>
<li><a href=”http://castorclasses.com/contact-us/about-us/mission-and-vision/”>Mission and Vision</li>
<li><a href=”http://castorclasses.com/contact-us/about-us/management/”>Managements</li>
<div id=”footerright”>
<h4>Thank You</h4>
<li>Castor Classes</li>
</div>
<br clear=”all”/>
</div>
</div>
</body>
</html>

How to set style of list in CSS?


—>This is use for give some decoration of list.

Syntax:-

ul{
list-style-type:circle OR squre OR upper roman OR upper alpha;
list-style-image:url(‘folder name’);
}
ul li{
line-height:30px;
}
ul li:hover{
margin-left:10px;
}
ul li a{
text-decoration:none;
}

Example:-

<!Doctype html>
<html>
<head>
<title>CastorClasses.com</title>
<style type=”text/CSS”>
ul{
list-style-type:circle OR squre OR upper roman OR upper alpha;
list-style-image:url(‘folder name’);
}
ul li{
line-height:30px;
}
ul li:hover{
margin-left:10px;
}
ul li a{
text-decoration:none;
}
</head>
<body>
<ul>
<li>
<a href=”#”>HOME</a></li>
<a href=”#”>ABOUT US</a></li>
<a href=”#”>SERVICES</a></li>
<a href=”#”>CONTACT US</a></li>
</UL>
</body>
</html>

How to make element floating from CSS?


 Image arrangement

Example:-

<!Doctype html>
<html>
<head>
<title>CastorClasses.com</title>
<style type=”text/CSS”>
.image{border:1px solid;
wedth:30px;
height:100px;
float:left;
margin:left;
}
</head>
<body>
<div class=”image”>
<img src=”flower.jpg” width=”100″ height=”100″/>
</div>
<div class=”image”>
<img src=”flower.jpg” width=”100″ height=”100″/>
</div>
<div class=”image”>
<img src=”flower.jpg” width=”100″ height=”100″/>
</div>
<br clear=”all” // This is use for next line.
</body>
</html>

Popular Posts

Categories

AI (27) Android (24) AngularJS (1) Assembly Language (2) aws (17) Azure (7) BI (10) book (4) Books (112) C (77) C# (12) C++ (82) Course (60) Coursera (176) coursewra (1) Cybersecurity (22) data management (11) Data Science (85) Data Strucures (6) Deep Learning (9) Django (6) Downloads (3) edx (2) Engineering (14) Excel (13) Factorial (1) Finance (5) flutter (1) FPL (17) Google (18) Hadoop (3) HTML&CSS (46) IBM (25) IoT (1) IS (25) Java (92) Leet Code (4) Machine Learning (43) Meta (18) MICHIGAN (4) microsoft (3) Pandas (3) PHP (20) Projects (29) Python (719) Python Coding Challenge (155) Questions (2) R (70) React (6) Scripting (1) security (3) Selenium Webdriver (2) Software (17) SQL (40) UX Research (1) web application (8)

Followers

Person climbing a staircase. Learn Data Science from Scratch: online program with 21 courses